It’s that time of the year when the air is full of performance reviews. Appraisal cycles are in full bloom and the managers are on a prowl! Every employee is seen making his best attempts to impress his manager, hopeful of getting a bigger chunk of the delicious pie called performance bonus and I was no saint either! But impressing my manager was no easy job! What is it that I could do? I probably needed something as path breaking as a time machine!
I realized that most Sales Reps in my organization ended up spending a huge chunk of their time navigating back and forth, from their Salesforce screens to monitor the new incoming Leads. This navigation was a big no-no as far as productivity was concerned and monitoring new leads was becoming increasingly difficult for them. “Why is that a big deal? You have Queues, Assignment rules and emails for Lead Management!” I hear you say. However, ours was a Salesforce instance that had just started out. And I needed to do something about it!
The solution involved using a combination of Apex and Visualforce but the secret component of my solution plan was to leverage the Home Page and Sidebar components. Let me show you how I did it in a few simple steps!
Written by Jigar Shah, Solution Architect at Eternus Solutions
Introspection…Innovation…Impression…
I thought and thought hard. I realized I had the power of Salesforce and I felt like a rock star! My plan was beginning to shape up now. Let me give you a sneak peek!I realized that most Sales Reps in my organization ended up spending a huge chunk of their time navigating back and forth, from their Salesforce screens to monitor the new incoming Leads. This navigation was a big no-no as far as productivity was concerned and monitoring new leads was becoming increasingly difficult for them. “Why is that a big deal? You have Queues, Assignment rules and emails for Lead Management!” I hear you say. However, ours was a Salesforce instance that had just started out. And I needed to do something about it!
The Game Plan!
My game plan was built on a simple fact: The user should be notified whenever a new lead is generated, irrespective of which tab he was navigating on: home or elsewhere within the application.The solution involved using a combination of Apex and Visualforce but the secret component of my solution plan was to leverage the Home Page and Sidebar components. Let me show you how I did it in a few simple steps!
-
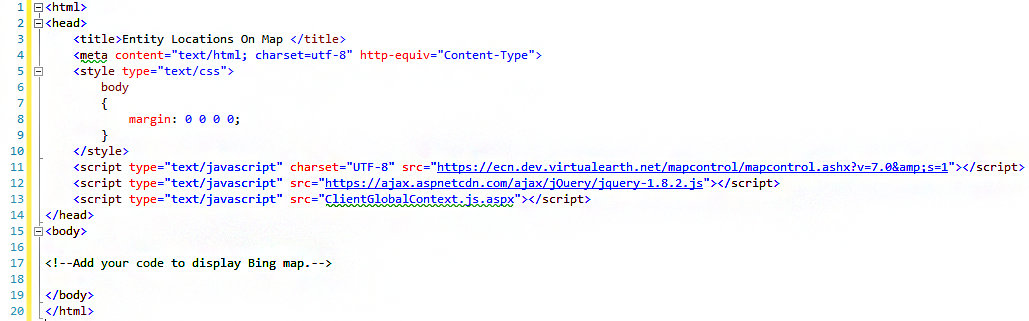
First, I created a simple Visualforce page using the code snippet given below. I call it the Lead Notifier Page.
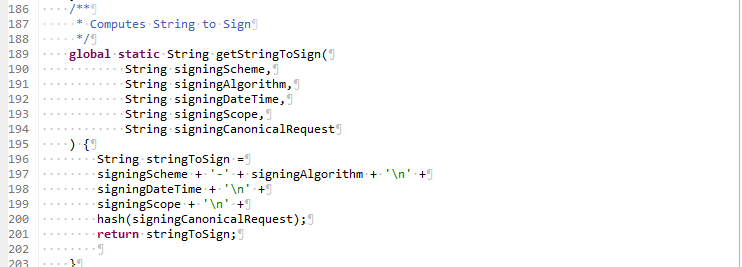
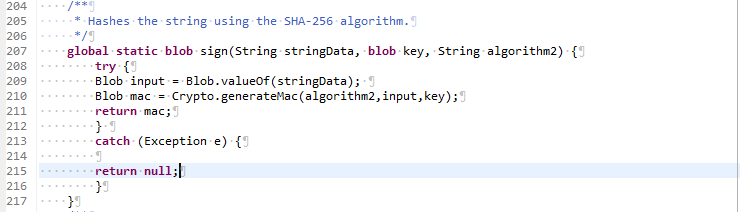
 Apex Code
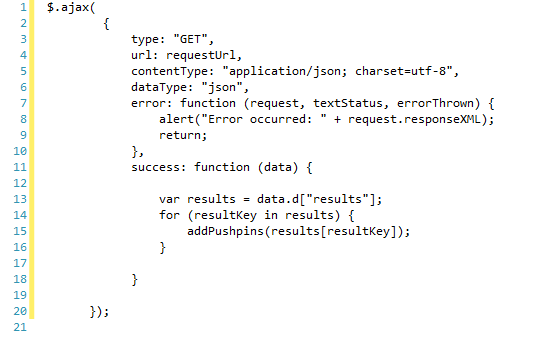
Visualforce Code
The Visualforce code leveraged the standard < apex:actionPoller > which enabled auto refresh, thus facilitating the lead notifier to pick up the newly created Lead information in real time.
-
Once this was done, I modified the home page component and added the Lead Notifier Page created in step 1, so that it started appearing on the Home page.

-
I went on to modify the sidebar component to add the Lead Notifier Page created in step 1, so that it started appearing on the Home page.


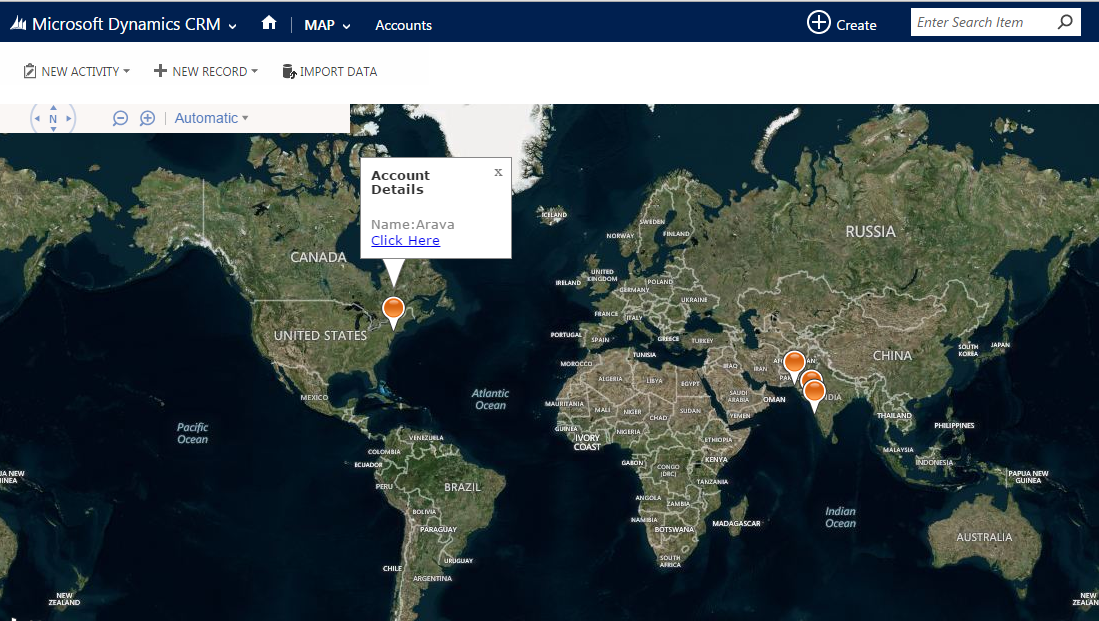
Finally, this is how my Home page looked like.

Written by Jigar Shah, Solution Architect at Eternus Solutions